

A Firefly screen recording tutorial should show real software actions first and use AI visuals only as clearly labeled supporting material. Adobe documents screen, webcam, and microphone recording in its beta Timeline editor. That gives creators a way to capture a genuine demonstration, then add an illustrated opener or cutaway without pretending the generated footage proves what the software did.
The useful dividing line is simple: record the evidence; generate the illustration. If viewers need to see a menu open, a setting change, or a file appear, keep that moment in the actual screen capture.
Evidence basis: This is a documentation-based workflow, checked October 29, 2026. The example script and timeline are original production plans, not a completed Tech4GenZ recording or a hands-on performance test. Adobe’s October feature summary lists recording, but its rolling update date does not establish an exact launch day.
In this article
- Key takeaways
- 1. Check access before your Firefly screen recording tutorial
- 2. Plan your Firefly screen recording tutorial
- 3. Record your Firefly screen recording tutorial
- 4. Add AI visuals to your Firefly screen recording tutorial
- 5. Review your Firefly screen recording tutorial before export
- Troubleshooting your Firefly screen capture workflow
- Your next step: finish a clear Firefly screen tutorial
Key takeaways
- Capture the real task before adding decorative AI material.
- Confirm account access and supported desktop requirements before planning the shoot.
- Separate shared-screen sound, microphone narration, and existing timeline playback.
- Label every generated segment where it appears, not only in the description.
- Check the downloaded video and uploaded playback, not just the editing preview.
1. Check access before your Firefly screen recording tutorial
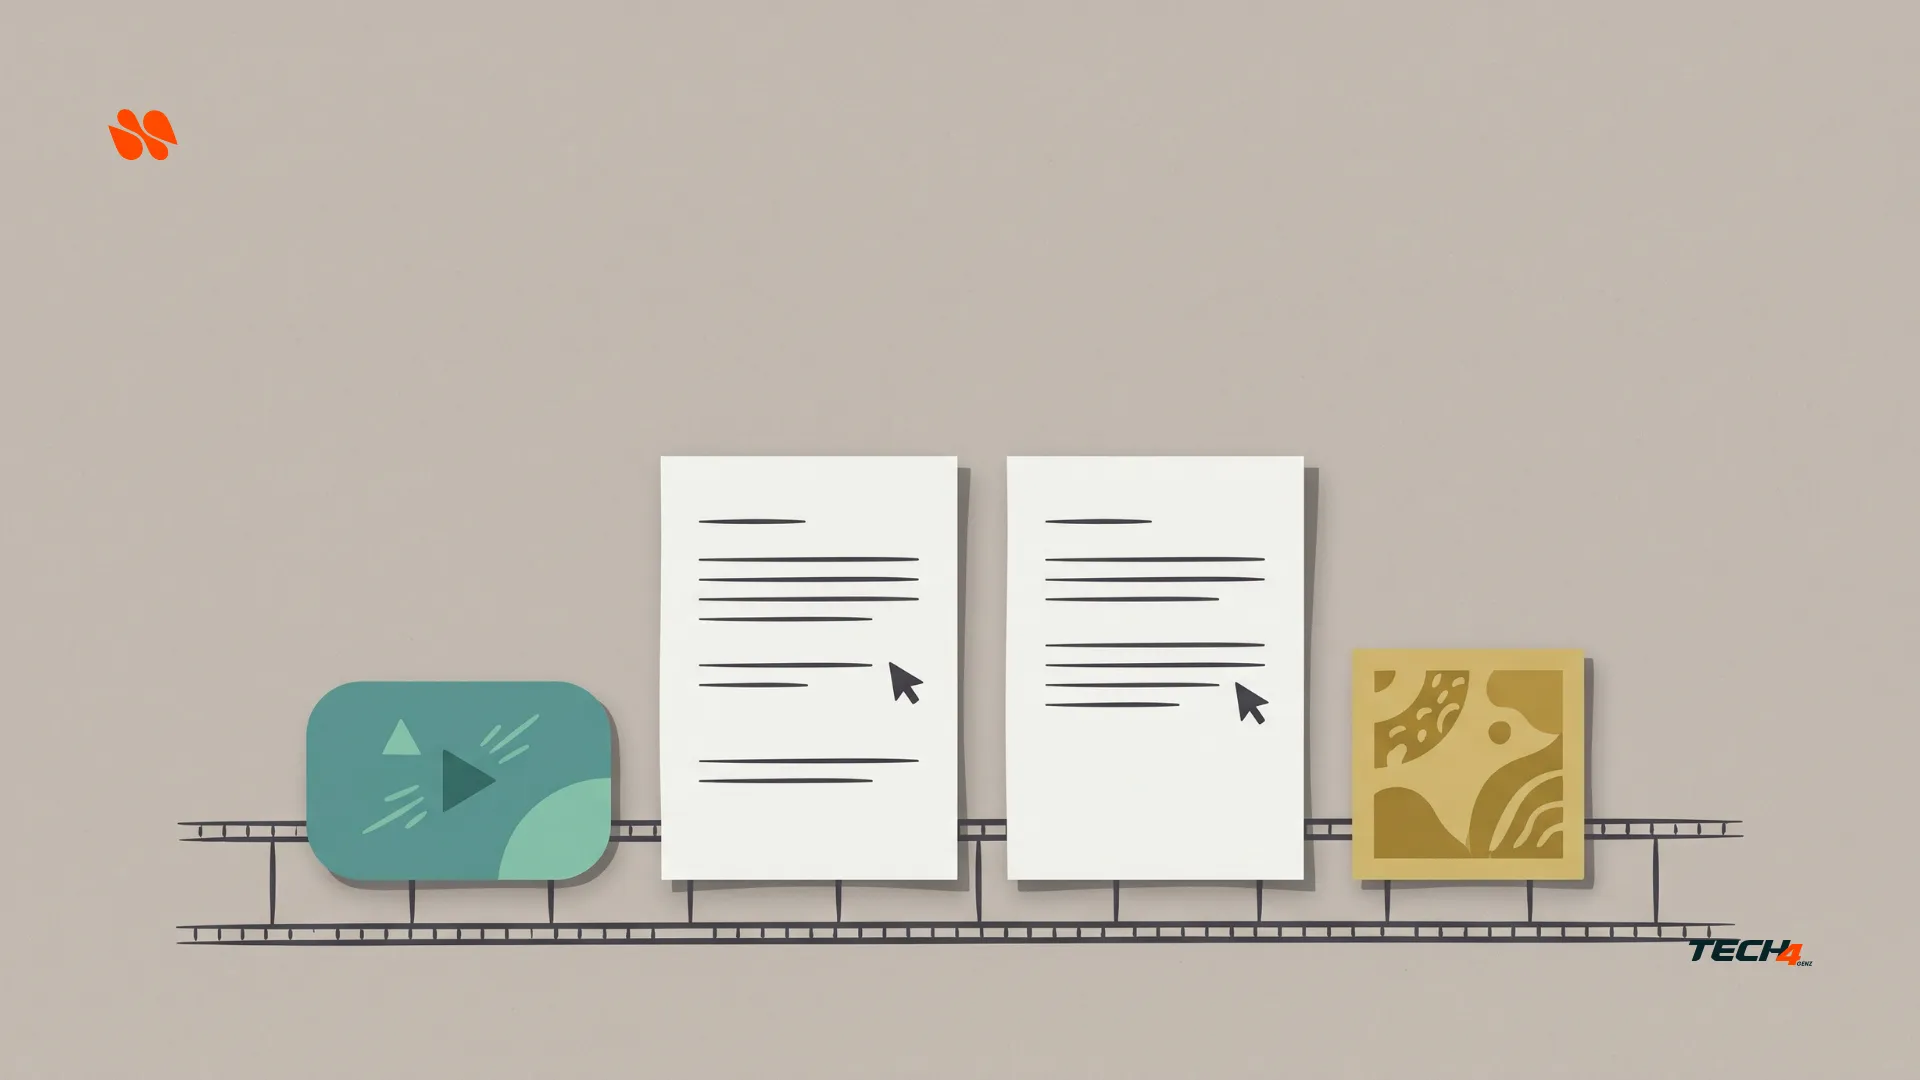
Adobe’s screen and webcam recording guide, updated October 28, describes three recording sources: screen, voiceover from a microphone, and webcam. You can select them separately or together. It also documents a three-second countdown and a maximum recording length of five minutes.
However, documentation is not confirmation that your particular account exposes every control. Open Firefly, confirm Timeline access, and check the recording dialog before promising a client one identical workflow on every device.
Firefly screen capture browser and system checks
The current Timeline technical requirements list desktop Windows 10 or macOS 12 minimums, Chrome or Edge version 144, 8 GB of memory, and JavaScript support. Adobe recommends the latest browser version.
There is an important documentation mismatch: the recording guide mentions a Chrome or Safari tab-sharing choice, while the requirements page lists Chrome and Edge. Therefore, start with the browsers listed in the requirements and confirm the actual sharing options. Do not interpret that Safari wording as a blanket Safari support guarantee.
Before recording, prepare:
- A permitted account and a non-sensitive demonstration file.
- A working microphone if narration is needed.
- A webcam only if showing the presenter adds something useful.
- A clean desktop or browser window with notifications suppressed.
- Permission for any third-party material, voice, or likeness that will appear.
Also, inspect the allowance or charge shown before generating optional media. This tutorial does not establish a free recording entitlement, unlimited generation, or one price for every plan.
2. Plan your Firefly screen recording tutorial
For this Firefly screen recording tutorial, use a deliberately small task: turn a fictional three-item launch checklist into a completed text file and save it in a demo folder. Use a plain-text editor you are allowed to record. The editor’s own menus and save behavior must come from your actual capture, not an imagined interface.
Create a folder called Tutorial Demo containing no private files. Then prepare this fictional text:
Launch checklist
[ ] Confirm the title
[ ] Check the captions
[ ] Review the exported video
The demonstration will change only the first checkbox to [x] and save the file as launch-checklist.txt. Although the task is simple, viewers can verify the action and its result. That is more useful than an attractive montage with no reproducible outcome.
Firefly screen recording tutorial: a 60-second script
The timings below are target edit slots, not measured recording times. Read at a comfortable pace and extend the edit if your genuine demonstration needs longer.
| Target time | Picture | Narration or on-screen copy |
|---|---|---|
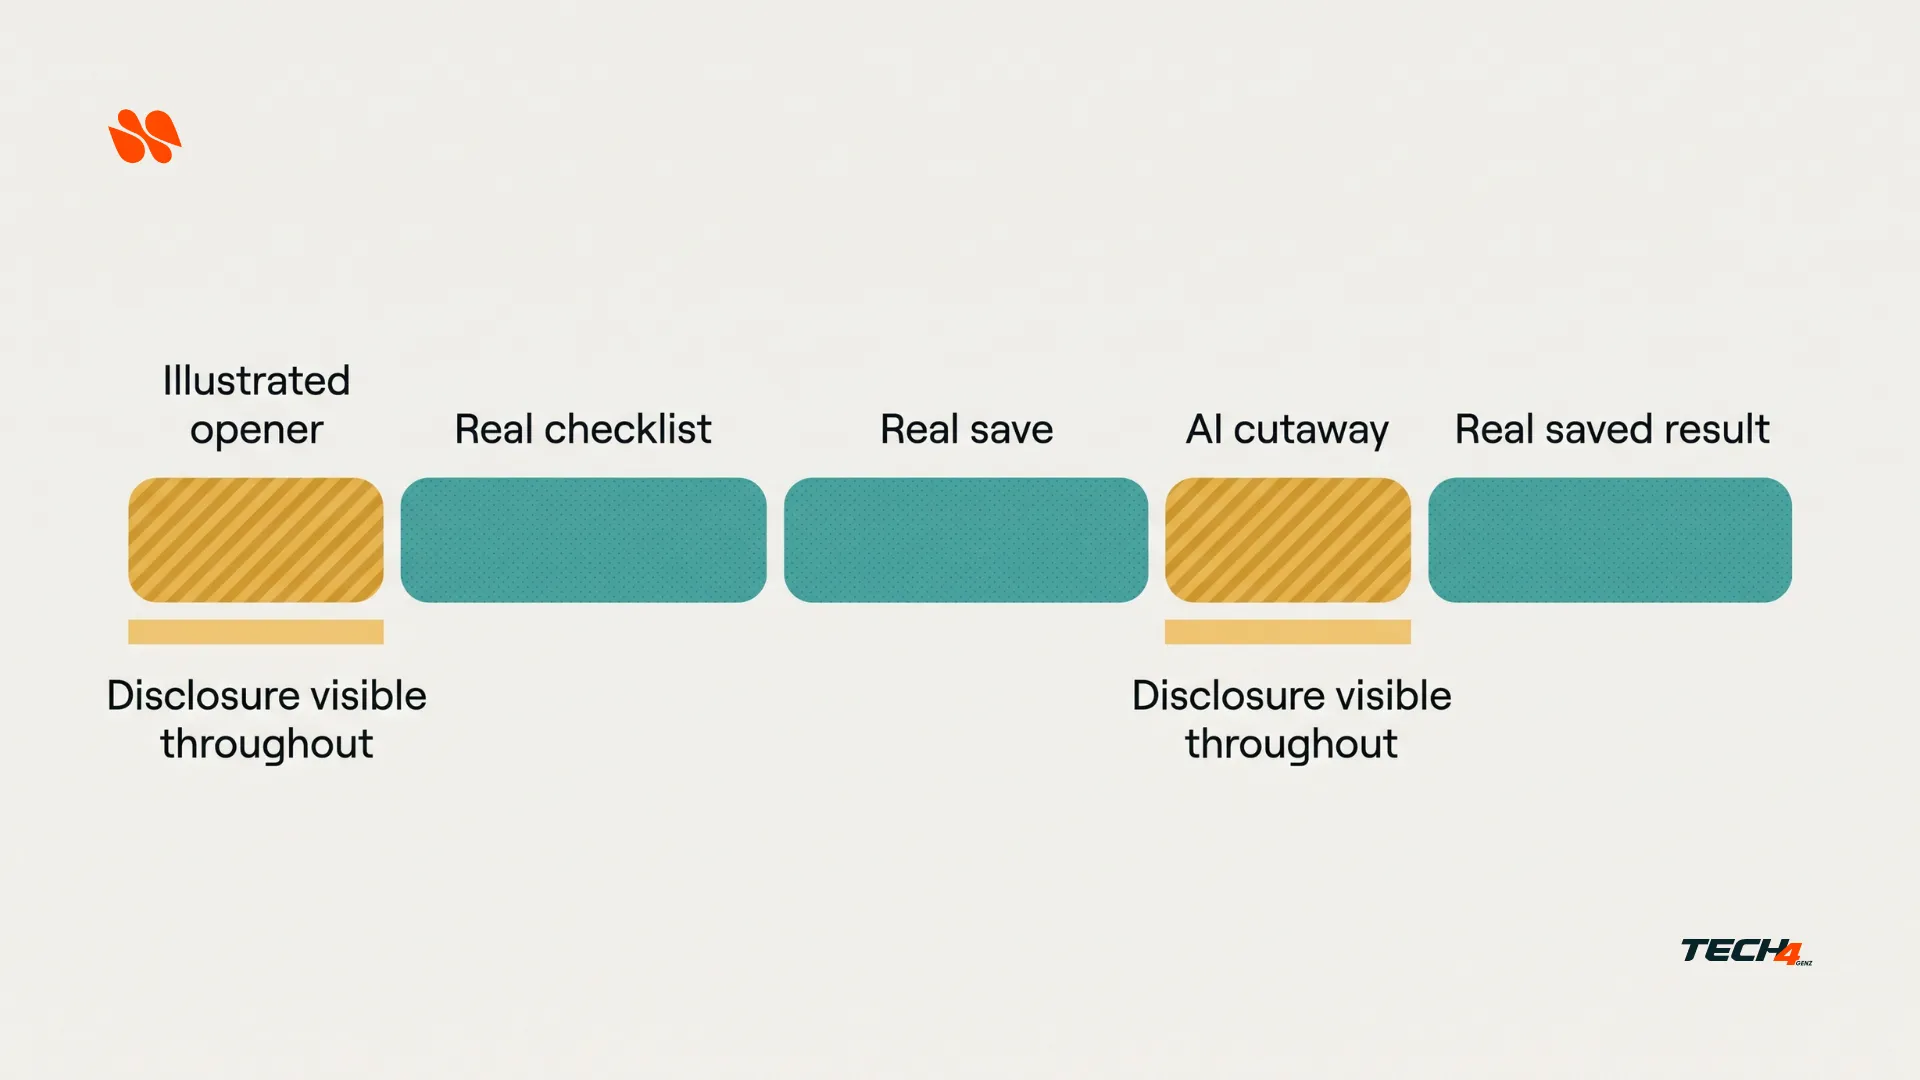
| 0:00 to 0:04 | Original illustrated opener | “One small task, shown from start to saved file.” |
| 0:04 to 0:12 | Real text-editor window and checklist | “This is a fictional launch checklist. I’ll mark the title complete, then save the file.” |
| 0:12 to 0:28 | Real cursor changes the first checkbox | “I change the first empty box to an x. The other two tasks stay unfinished.” |
| 0:28 to 0:44 | Real save action and filename | “Now I save it as launch-checklist.txt in the Tutorial Demo folder.” |
| 0:44 to 0:48 | Optional abstract AI cutaway | “Illustration only. The next shot returns to the actual file.” |
| 0:48 to 1:00 | Real saved file reopened | “Here is the saved file. The title is checked; captions and export review still need work.” |
First, rehearse the task without recording. Next, decide which window needs to be shared. If you must switch to a file manager, confirm that the chosen capture surface will include it. Otherwise, record a second permitted shot rather than accidentally exposing the whole desktop.
For a finished Firefly screen recording tutorial, the return to the saved file matters. It shows the result instead of asking the audience to trust the narration.
3. Record your Firefly screen recording tutorial
Open the Firefly Timeline basics. Adobe’s timeline presets guide describes creating a new timeline from the project and timeline name in the header. Use a landscape 16:9 composition for this proposed website and YouTube example, then check that your text remains readable at the intended viewing size.
Next, follow the documented recording sequence:
- In Project media, select Add, then Record video. Adobe also documents Record in an empty timeline and a recording control in the timeline toolbar when media already exists.
- If the timeline contains media, place the playhead where the new recording should begin. The playhead is the vertical position marker in the edit.
- In Media recording, choose Screen recorder, Voiceover, Webcam, or the combination you need.
- Grant the necessary camera or microphone permission when the browser asks. Then choose the intended devices. Speak and inspect the microphone sound meter before continuing.
- Choose the browser tab, app window, or entire screen that the sharing dialog actually offers. Share the narrowest surface that can show the task completely.
- Set shared-content audio deliberately. Turn off Share with tab audio or Share with system audio when that sound is unnecessary.
- Select Record, wait through the three-second countdown, and perform the genuine task. Select the stop button when finished.
These labels and the five-minute limit come from Adobe’s recording guide, not an executed test in this article. If your interface differs, stop and verify the current control rather than guessing.
Firefly screen recording: keep three audio sources separate
Microphone narration is not the same as sound coming from the shared tab. Meanwhile, existing timeline playback is a third source to consider.
Adobe says timeline audio is muted during recording by default. You can unmute it with Unmute timeline playback while recording when needed. However, do not turn everything on automatically. For this checklist example, use microphone narration, keep shared-content audio off, and leave timeline playback muted unless you have a specific reason to hear it.
Then record a short sample and listen before capturing the full task. If the voice is missing or doubled, resolve the input or monitoring problem first. An attractive opener cannot fix an unusable explanation.
Review your Firefly screen and webcam recording tracks
According to Adobe, the screen recording goes to the first available track. Webcam footage and voiceover are combined into a single clip and placed on the next available track. Recorded clips appear as overlays in front of the main clip on the canvas.
Therefore, inspect the composition after recording. Resize or reposition overlays so the screen is readable and a face does not cover the filename, cursor, or save controls. Then play from the recording start, adjusting clip position or trimming where needed to synchronize the result.
Also, preserve the original recording. Adobe documents Download original in a recorded clip’s Project media context menu. Keep that untouched file separately from edited exports.
4. Add AI visuals to your Firefly screen recording tutorial
AI B-roll means generated supporting footage used between the main demonstration shots. In this workflow, it provides atmosphere or a section break. It does not show the software completing the task.
For example, an abstract arrangement of paper cards can introduce the idea of organizing a checklist. However, a generated screen showing a successful save would replace the very evidence the audience needs.
Generate illustrative cutaways for your Firefly video tutorial
Adobe’s text-to-video instructions describe selecting a model, choosing available settings, entering a prompt, and downloading the generated result. They also note that controls vary by model. Therefore, check the visible model label rather than assuming every clip generated inside Firefly uses an Adobe model.
Use this optional cutaway prompt:
Create an abstract editorial animation of three blank paper checklist cards on a warm gray desk. One teal paper tab moves gently beside the first card. Use a locked camera, soft light, and restrained movement. Keep the composition clearly illustrative. No software interface, screen, cursor, readable text, checkmarks, logos, people, or claims of task completion. Landscape 16:9.
Choose a short supported duration in your account, then trim the accepted result to the proposed four-second slot. The requested movement is direction, not a guarantee. If the generation adds unwanted lettering or a misleading completion symbol, reject it or use an original static graphic instead.
Next, download the accepted clip. Adobe’s media-import guide describes adding files through Select files or Project media > Add > Your device. Put the cutaway between real demonstration segments, not over the click or save action the viewer must inspect.
Label AI visuals throughout your Firefly screen tutorial
Use a visible label such as AI-generated illustration. Not screen footage. Keep it on screen throughout the generated segment. Additionally, use a clear cut back to the genuine capture and a label such as Actual screen recording when that distinction could otherwise be missed.
Adobe’s edit text, image and video files guide explain Text > Add text and trimming or stretching the text layer to control its duration. Add the label as editable text rather than asking the generator to draw it.
For an opener made in a separate design tool, keep the title and disclosure editable too. Our Canva Craft editing checks explain why a polished graphic still needs a realistic revision and export check. That is a companion graphics workflow, not a Firefly integration claim.
A Firefly screen recording tutorial should still work if you remove the AI cutaway. If removing it makes the actual task impossible to understand, restore the missing genuine footage.
See also: Recraft Styles Vector Icon Set: A Six-Icon Workflow and Ideogram Vector: Editable Artwork vs. Editable Lettering for editable vector artwork for an opener that still needs a revision check.
5. Review your Firefly screen recording tutorial before export
First, listen to the full narration and compare it with the actual actions. Leave enough time for the viewer to see where the cursor goes. Avoid cutting directly from an unselected menu to a finished result when that hides the step being taught.
Next, follow Adobe’s caption workflow: open Captions in the left toolbar and turn on the toggle or select Create captions. Review the generated wording, then use Text-based editing to correct the transcript. Adobe also documents exporting an .srt caption file from that panel.
Check filenames and interface labels especially carefully. For a US version, narration might say “Choose a color.” For a UK version, an editor-added instructional caption might say “Choose a colour.” However, preserve the real interface label when teaching a specific button. Do not change a visible “Color” control into “Colour” and make the viewer search for text that is not there.
Check Firefly tutorial captions, privacy, and segments
| Segment | Required check | Fix before delivery |
|---|---|---|
| Opener | Title is accurate and supporting art is clearly illustrative | Remove any implied screenshot or fabricated result |
| Real demonstration | Cursor, change, save action, and saved result are visible | Re-record missing evidence instead of generating it |
| Webcam and voice | Face placement is unobtrusive and voice matches the action | Move the overlay or correct the timing |
| AI cutaway | Label lasts for the full segment | Extend the label or remove the segment |
| Captions | Words, timing, contrast, and position are usable | Correct errors and avoid covering controls |
| Privacy | No private tabs, filenames, notifications, or account details remain | Re-record a clean shot or redact carefully and recheck |
Before any upload, confirm permission for the captured material and the applicable account terms for generated assets. A paid account does not clear someone else’s artwork, voice, likeness, or confidential files. Likewise, a visible AI label explains provenance; it does not grant rights.
For a team handoff, assign someone to approve the factual demonstration and someone to inspect the deliverable, if separate roles are needed. Our AI work review checklist covers that broader acceptance problem without replacing this video-specific review.
Export the Firefly screen recording tutorial and inspect the file
Adobe’s export guide describes Download at the upper right or Export in the main menu. Its download settings include 720p, 1080p, or 4K resolution and High, Medium, or Low quality, with MP4 output.
For this proposed landscape example, start by checking a 1080p export at High quality if available. That is an editorial starting point, not a measured optimum. Increasing resolution cannot restore text that was unreadable in the original capture.
Then open the downloaded MP4 outside the editor. Check the first and last frames, narration timing, cursor visibility, labels, captions, and any private details. Finally, inspect the processed playback after uploading to the intended destination.
If you bring in an optional generated clip from Runway instead, our Seedance 2.0 High Bitrate on Runway guide explains the separate source-detail versus file-size decision. Do not confuse Seedance’s generation bitrate setting with Firefly’s export quality options. The useful shared habit is to inspect the source, editor export, and final playback separately.
Troubleshooting your Firefly screen capture workflow
| Problem | First action | Keep the evidence honest |
|---|---|---|
| Record video is missing | Recheck Timeline access, current requirements, and account interface | Do not invent a hidden menu or universal rollout |
| The wrong window appears | Stop and select the intended sharing surface | Remove the accidental capture before publishing |
| Narration is silent or duplicated | Check microphone selection, meter, shared audio, and playback monitoring | Make a fresh sample before another full take |
| The presenter covers a control | Reposition or resize the overlay and replay the section | Keep the actual operation visible |
| A generated scene looks like a software result | Replace it with an abstract visual or genuine capture | A disclosure alone does not make fabricated proof useful |
| Exported text is hard to read | Review source scale, crop, caption placement, and export settings | Do not claim 4K automatically repairs the source |
Frequently Asked Questions
What should a Firefly screen recording tutorial show first? Real software actions first. Record the evidence and generate the illustration. AI visuals are only clearly labelled supporting material, and a tutorial should still work if the AI cutaway is removed.
What can you record in the Firefly Timeline editor? Screen, webcam footage and voiceover. The screen recording goes to the first available track. Select Record, wait through the three-second countdown, and the recording has a five-minute limit.
What are the minimum desktop requirements given in the post? Desktop Windows 10 or macOS 12, Chrome or Edge version 144, 8 GB of memory and JavaScript support. Adobe recommends the latest browser version.
How should AI visuals be labelled? Label every generated segment where it appears, not only in the description. Keep the label on screen throughout the generated segment, for example: AI-generated illustration. Not screen footage.
What should you check before publishing? Check the downloaded video and uploaded playback, not just the editing preview. Also check that no private tabs, filenames, notifications or account details remain.
Your next step: finish a clear Firefly screen tutorial
Build the first Firefly screen recording tutorial around one permitted task, one readable capture, and one visible result. Then add only the supporting visuals that help a viewer follow it.
Before publishing, ask a final question: Can someone distinguish every real action from every generated illustration without reading the description? If the answer is no, simplify the edit. A clear demonstration with one honest opener is a better teaching asset than a cinematic sequence that obscures what actually happened.


Pingback: Kling product consistency: 5 Runway Dev Checks - Tech4GenZ
Pingback: Pixelmator Pro Generate Fill: 5 Checks Before November - Tech4GenZ
Pingback: Ideogram Vector: Editable Artwork vs. Editable Lettering - Tech4GenZ